Integrating ChatGPT in Qt Applications
ChatGPT, LLMs, and other generative AI tools have recently been the center of attention and excitement in the tech world. Have you considered creating a simple quiz game with our favorite UI toolkit, featuring content generated on-the-fly by ChatGPT? How challenging could that be? Let's find out! :)
Here's what you'll need:
- An account and API key on the OpenAI Platform. You can create these at https://platform.openai.com. Please note that accessing the ChatGPT API incurs certain charges, with amounts varying based on the services or models requested. All available options and prices can be found at https://openai.com/pricing.
- A working installation of Qt 6.5, complete with CMake and an appropriate C++ compiler.
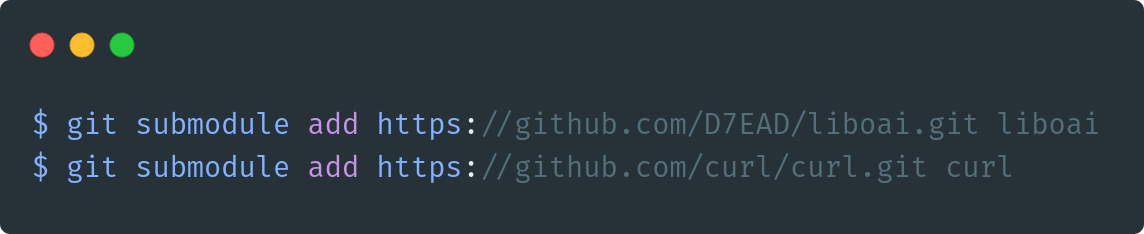
- The liboai library (https://github.com/D7EAD/liboai) - a C++ library for accessing the OpenAI API.
- The curl library (https://github.com/curl/curl), which is a direct dependency of liboai.
CMake Project Setup
To simplify the process, we'll set up liboai and curl as git submodules for our project.
With these components in place, we're ready to create our CMakeLists.txt file:
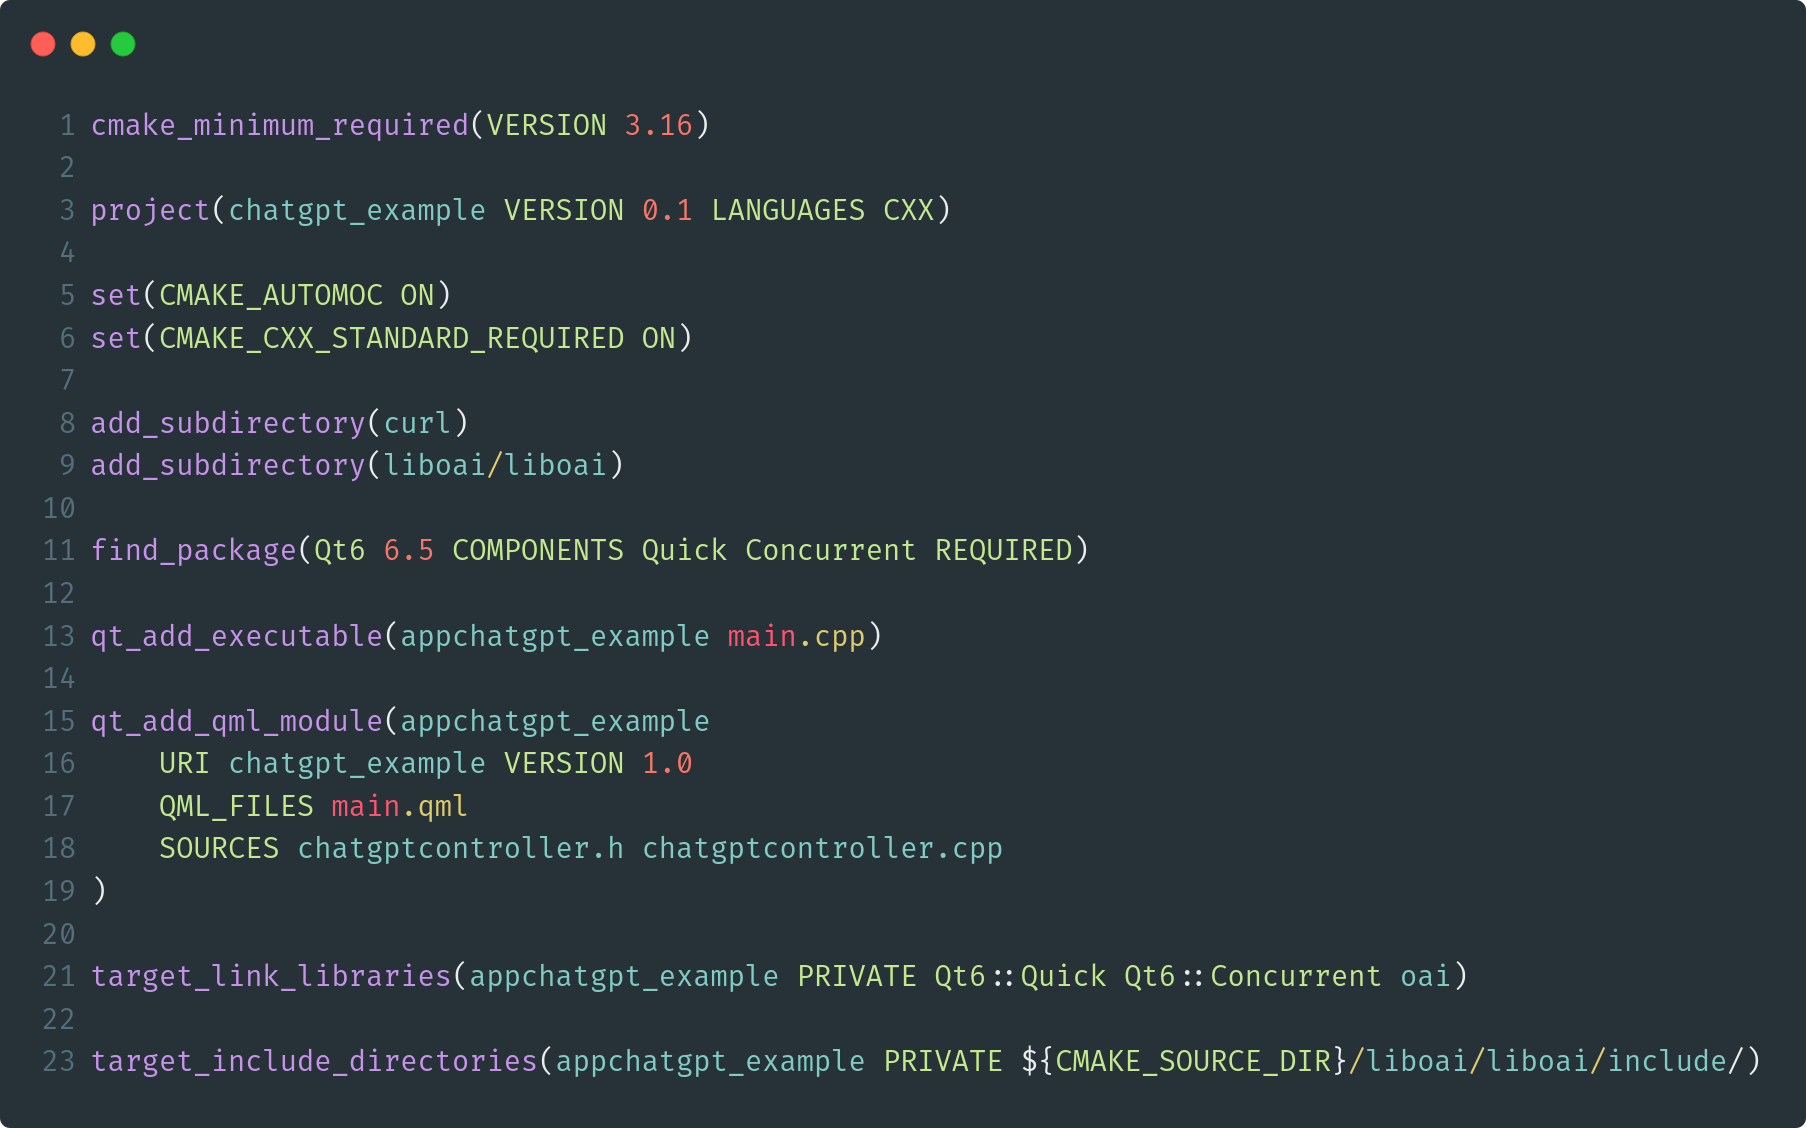
This file includes liboai and curl projects as CMake subdirectories (lines 8 and 9), establishes our executable target (line 13), and introduces a QML module offering our QML UI along with a basic ChatGPTController QML singleton to enable rudimentary ChatGPT functionality (lines 15-19).
The ChatGPTController class
We will encapsulate all ChatGPT communication within a new QML object type called ChatGPTController. Let's examine the header file for this class:
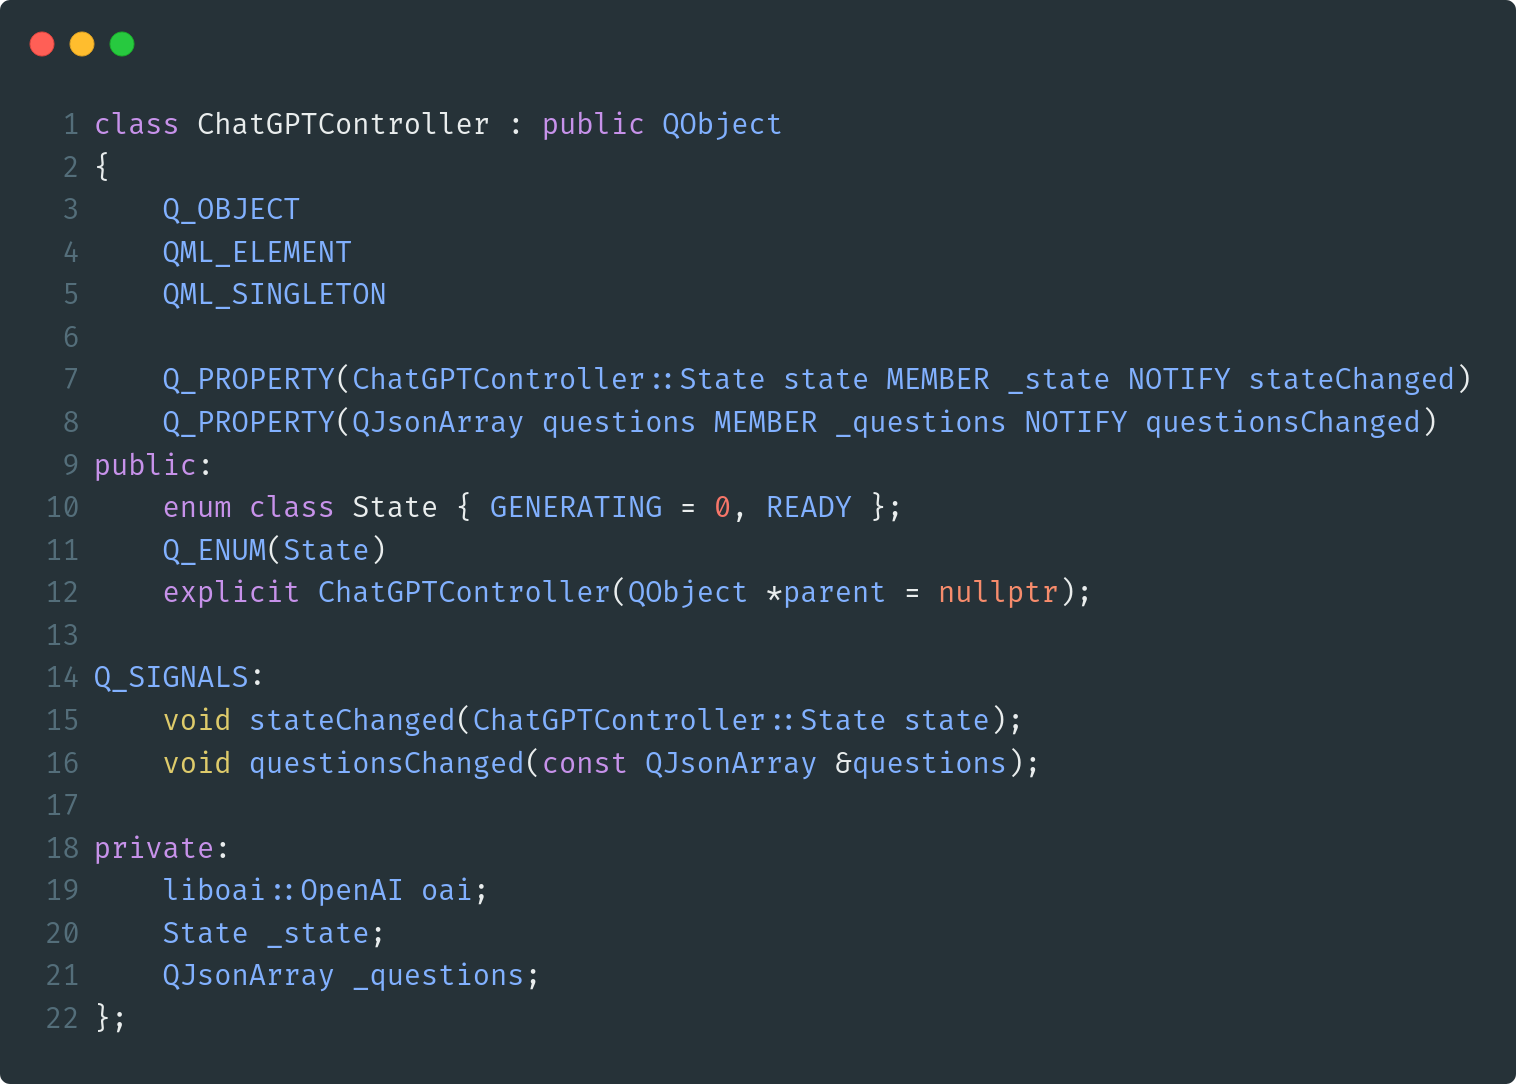
The ChatGPTController type is declaratively registered as a QML singleton at lines 4 and 5. This allows us to interact easily with the controller in QML files, by simply importing the QML module in which it's defined, as stated in the URI parameter of the qt_add_qml_module command (line 16 in CMakeLists.txt). This controller retains the liboai client object (at line 19), a state variable to distinguish between the "generating game" (at line 20) and "ready" states, and a JSON array holding the generated questions (at line 21).
Let's now examine how this controller can be implemented:
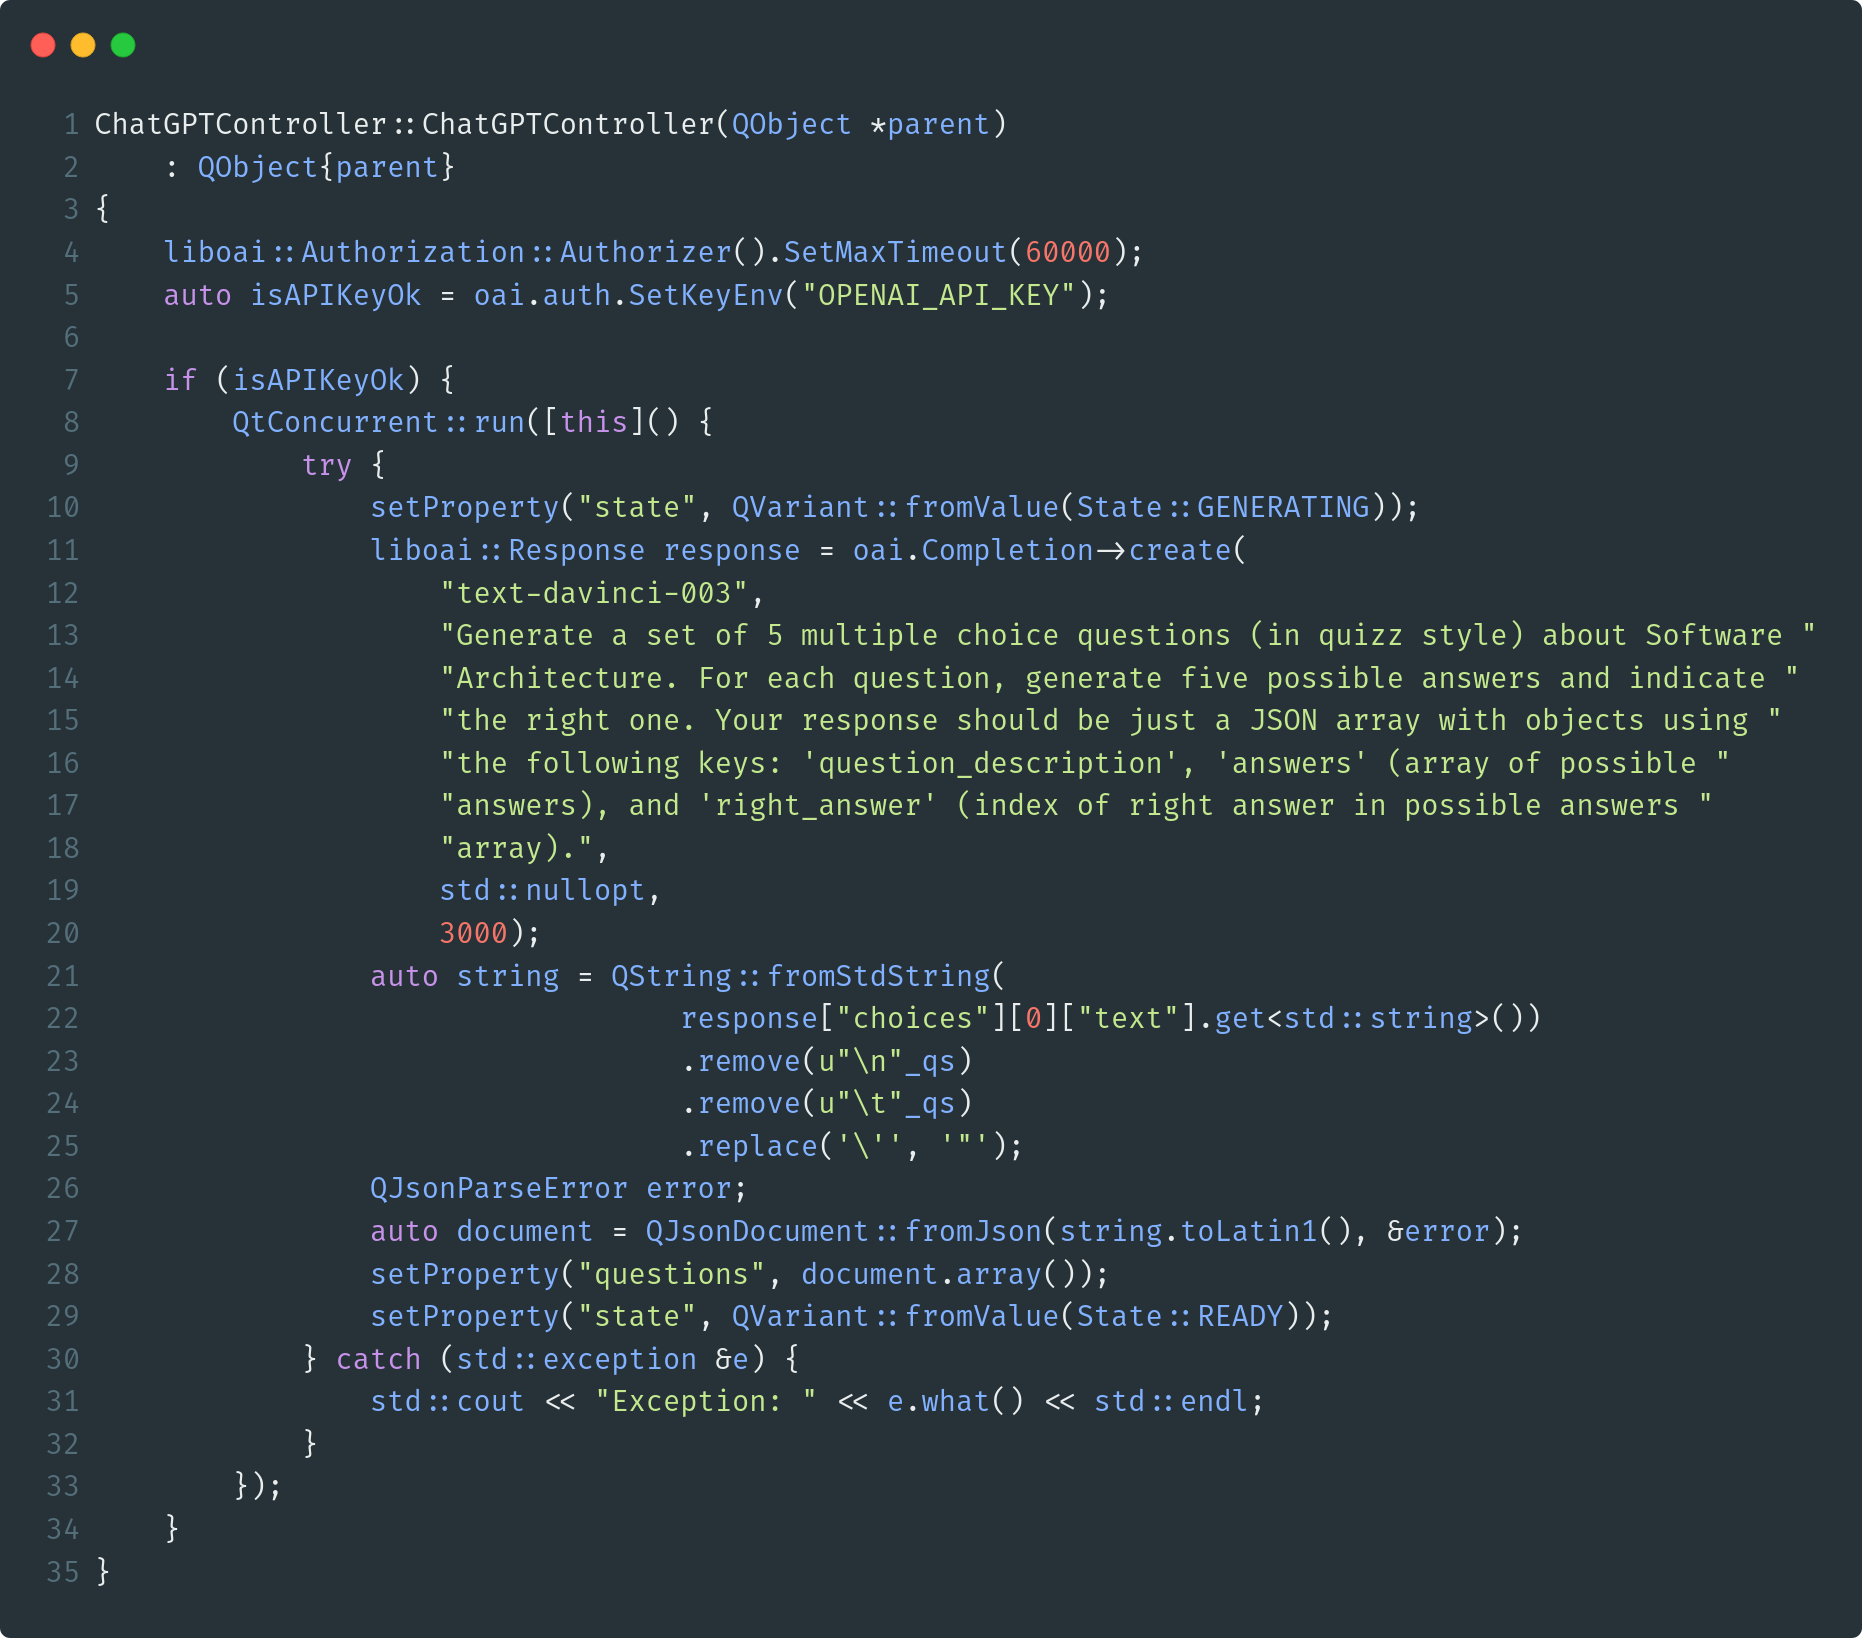
OpenAI API requests may take some time to return the corresponding responses due to inherent unpredictability. At line 4, we increase the default curl timeout to 60s to avoid a "Timeout was reached (E_CURLERROR:0x06)" error for longer requests. liboai typically offers both synchronous and asynchronous versions of its ChatGPT communication API. In this example, we will use the synchronous version, wrapping this call in a QtConcurrent::run() request. As outlined at lines 11-20, we will utilize OpenAI's Completion API (additionally, with the text-davinci-003 model) to ask ChatGPT to supplement a provided text with additional information.
In this example, we prompt ChatGPT to generate five questions related to the "Software Architecture" topic. This example could be improved by creating a QML screen that prompts the user to specify a topic, which is then included as part of the request's prompt. We specifically ask ChatGPT to provide results in a particular JSON array format. After cleaning up the response (lines 21-27), we set this JSON array as the controller's questions property (line 29).
The QML UI
Next, let's see how we can use the ChatGPTController to display the generated answers in a user-friendly UI, allowing users to select their responses. Our quiz game features a rather straightforward UI, defined in the main.qml file:
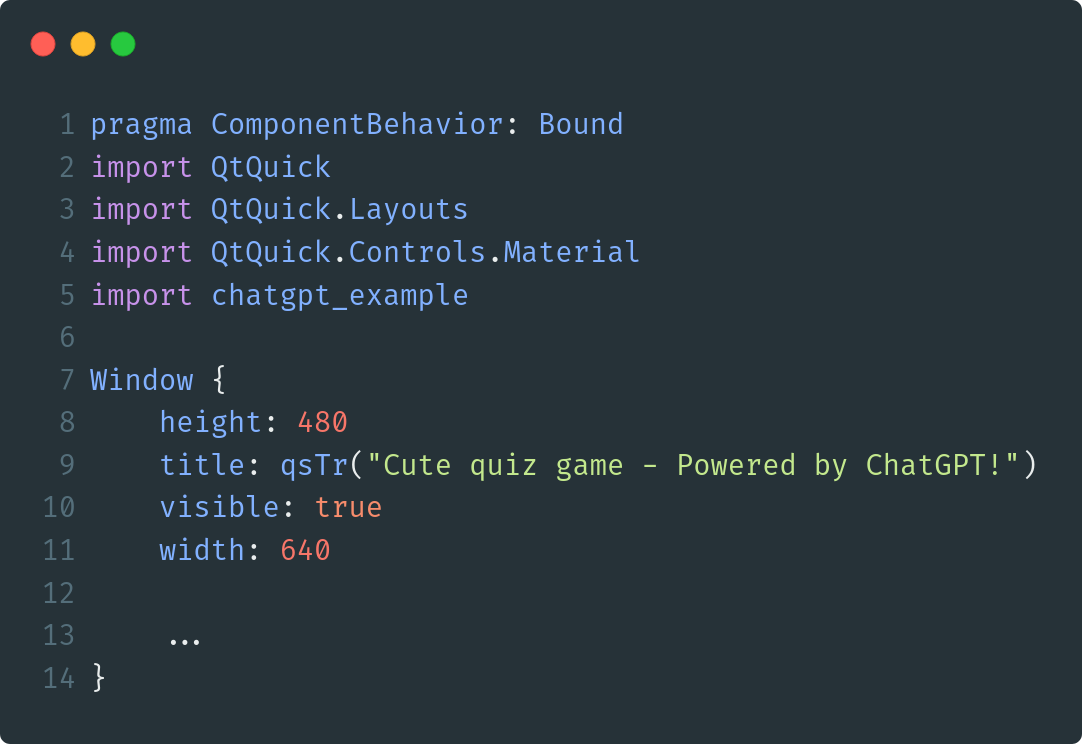
Our application is built around a simple Window QML type. Note the import of our custom QML module at line 5, making the ChatGPTController singleton available for use in this QML document. We will use a BusyIndicator element to show when ChatGPT is generating questions:
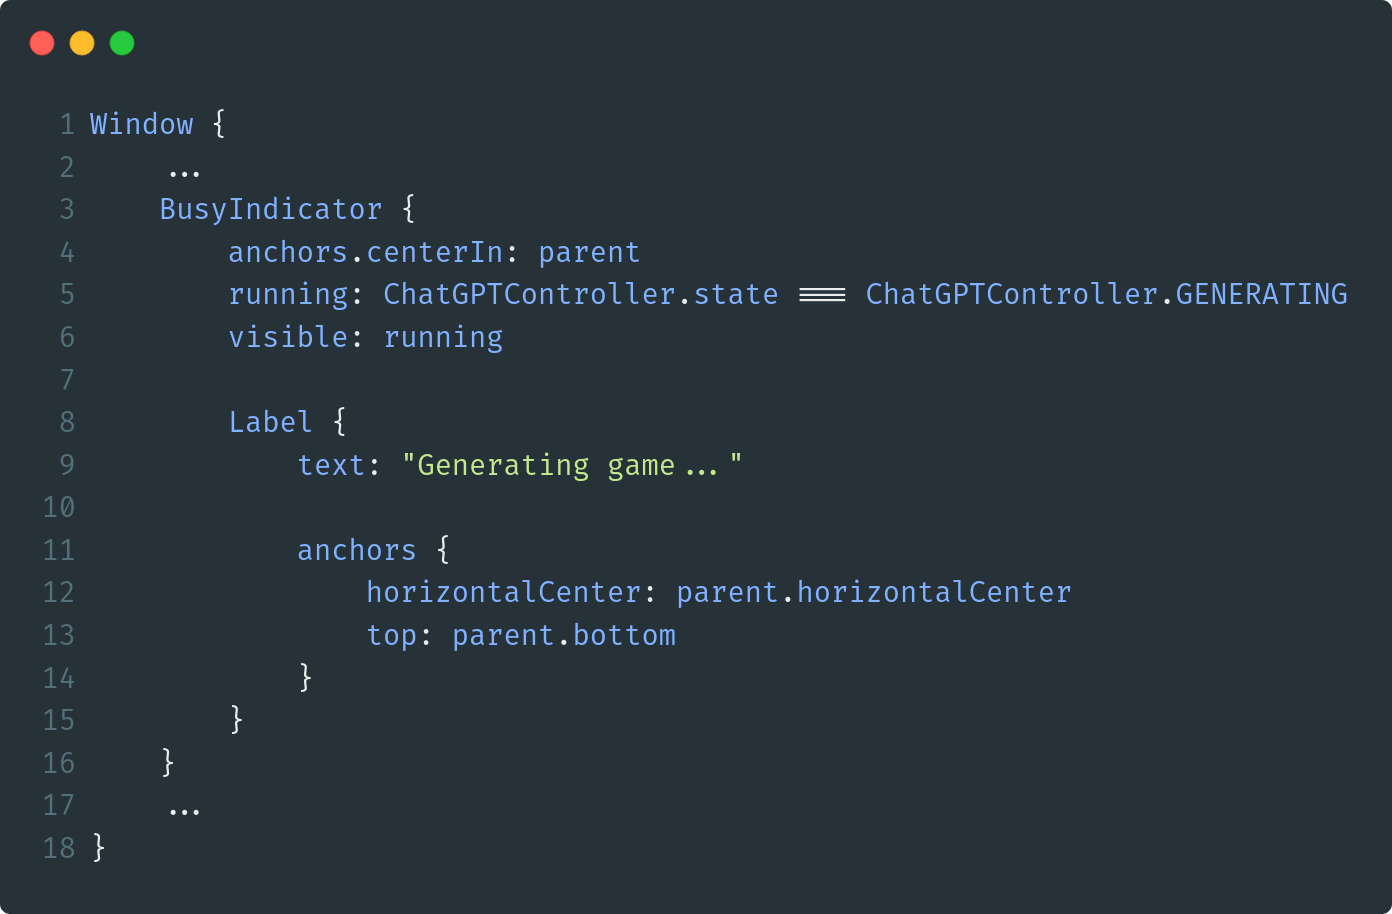
Observe, at line 5, how we bind the BusyIndicator's running property to an expression that checks if the ChatGPTController is currently generating questions. To display the questions and their corresponding available answers, we will use a ListView element:
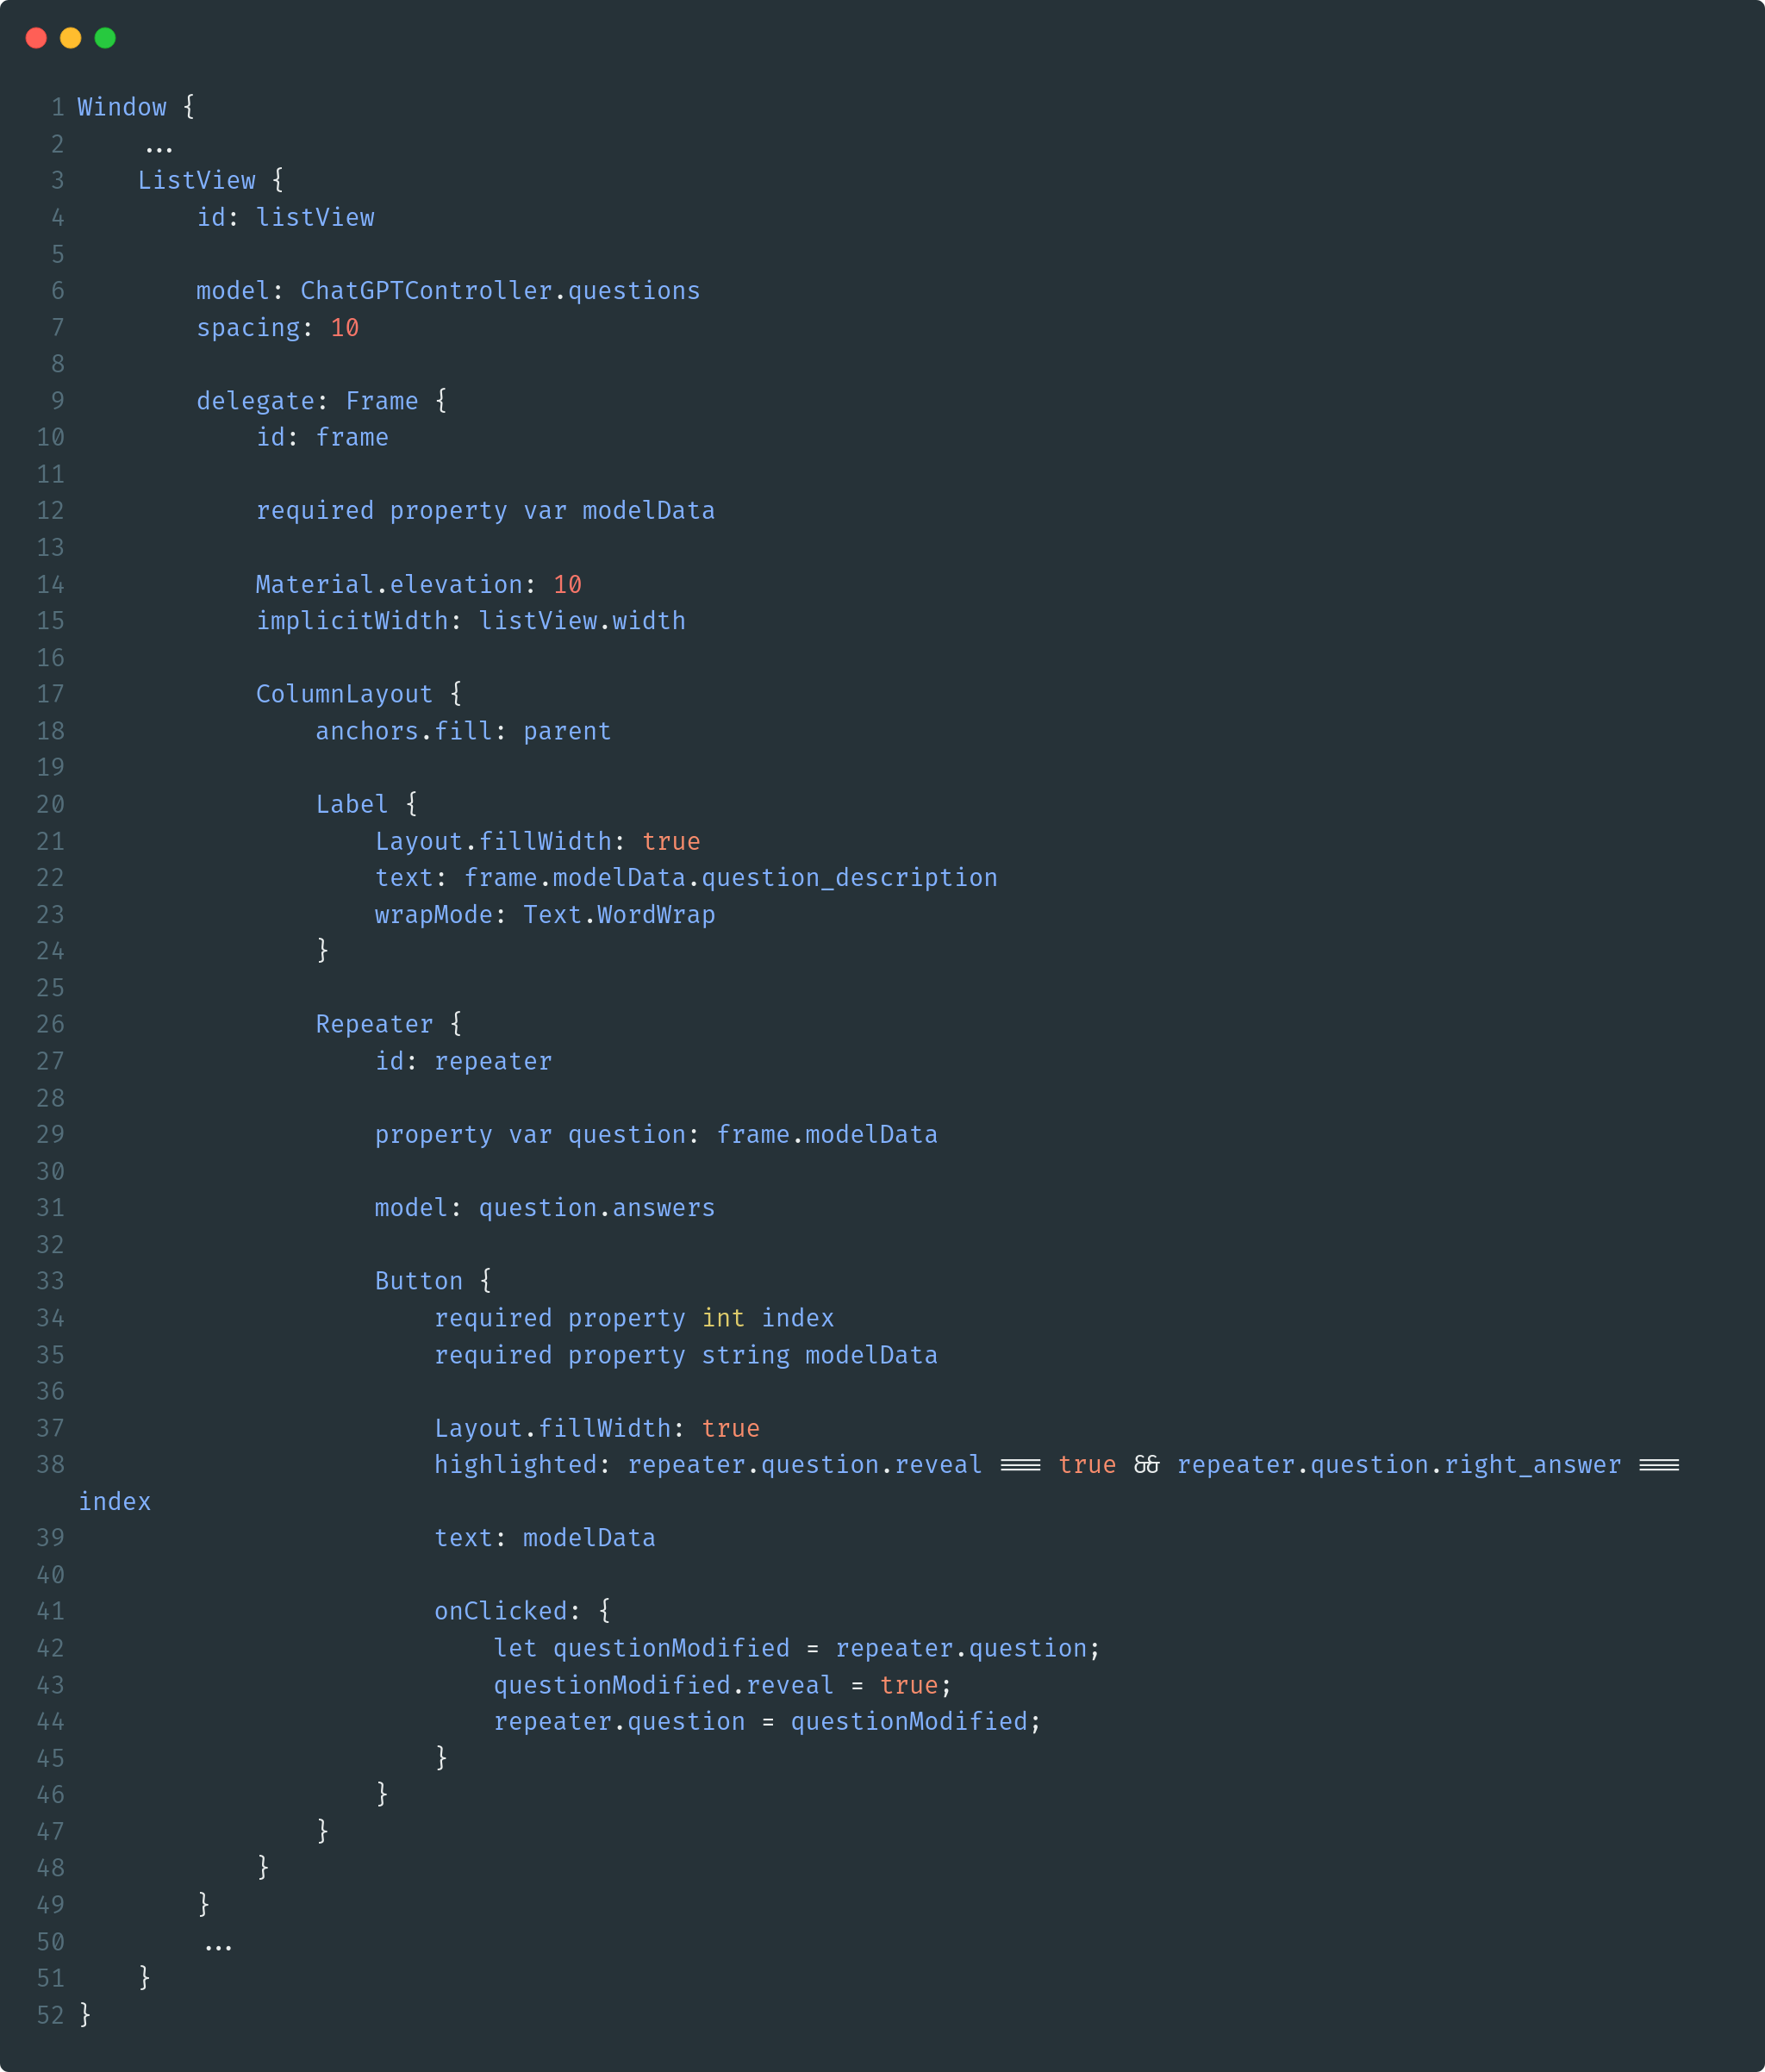
This ListView element uses the ChatGPTController's questions property, a JSON array, as its model (line 6). Each question is presented within a Frame element, defined as the ListView's delegate component (line 9). The question description is shown in a Label element (lines 20-24), and available answers are presented as Button elements (created using a Repeater). Upon selecting an answer by clicking its corresponding button, the correct answer is revealed by highlighting it (at line 38).
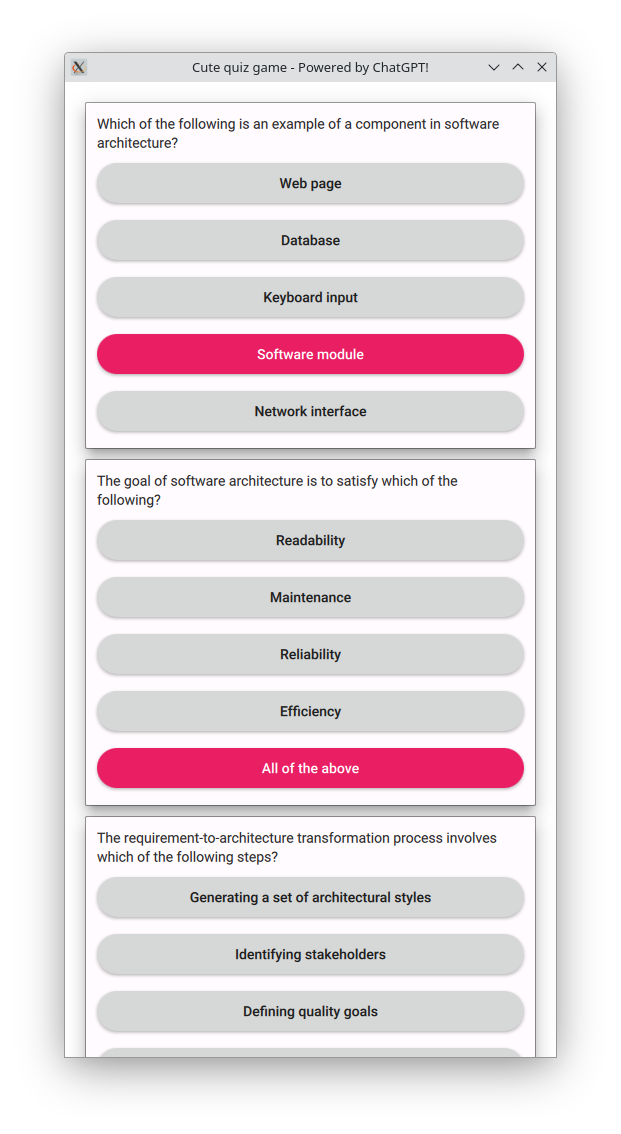
Please note that, to run this, you must define an environment variable named OPENAI_API_KEY containing your OpenAI API key. Here's our final result:
That concludes our session today! Happy coding!